Imaging Workflow
Preflight
There are 5 steps for Reflective Preflight necessary to complete to fully calibrate the equipment and software:
- Setting Camera Focus and Resolution
- Updating Basic Characteristics
- Creating an LCC (Lens Cast Calibration)
- Setting White Balance
- Setting Exposure
Camera Focus and Resolution
For best results, resolution (PPI) and focus should be set manually when using the camera at an angle.
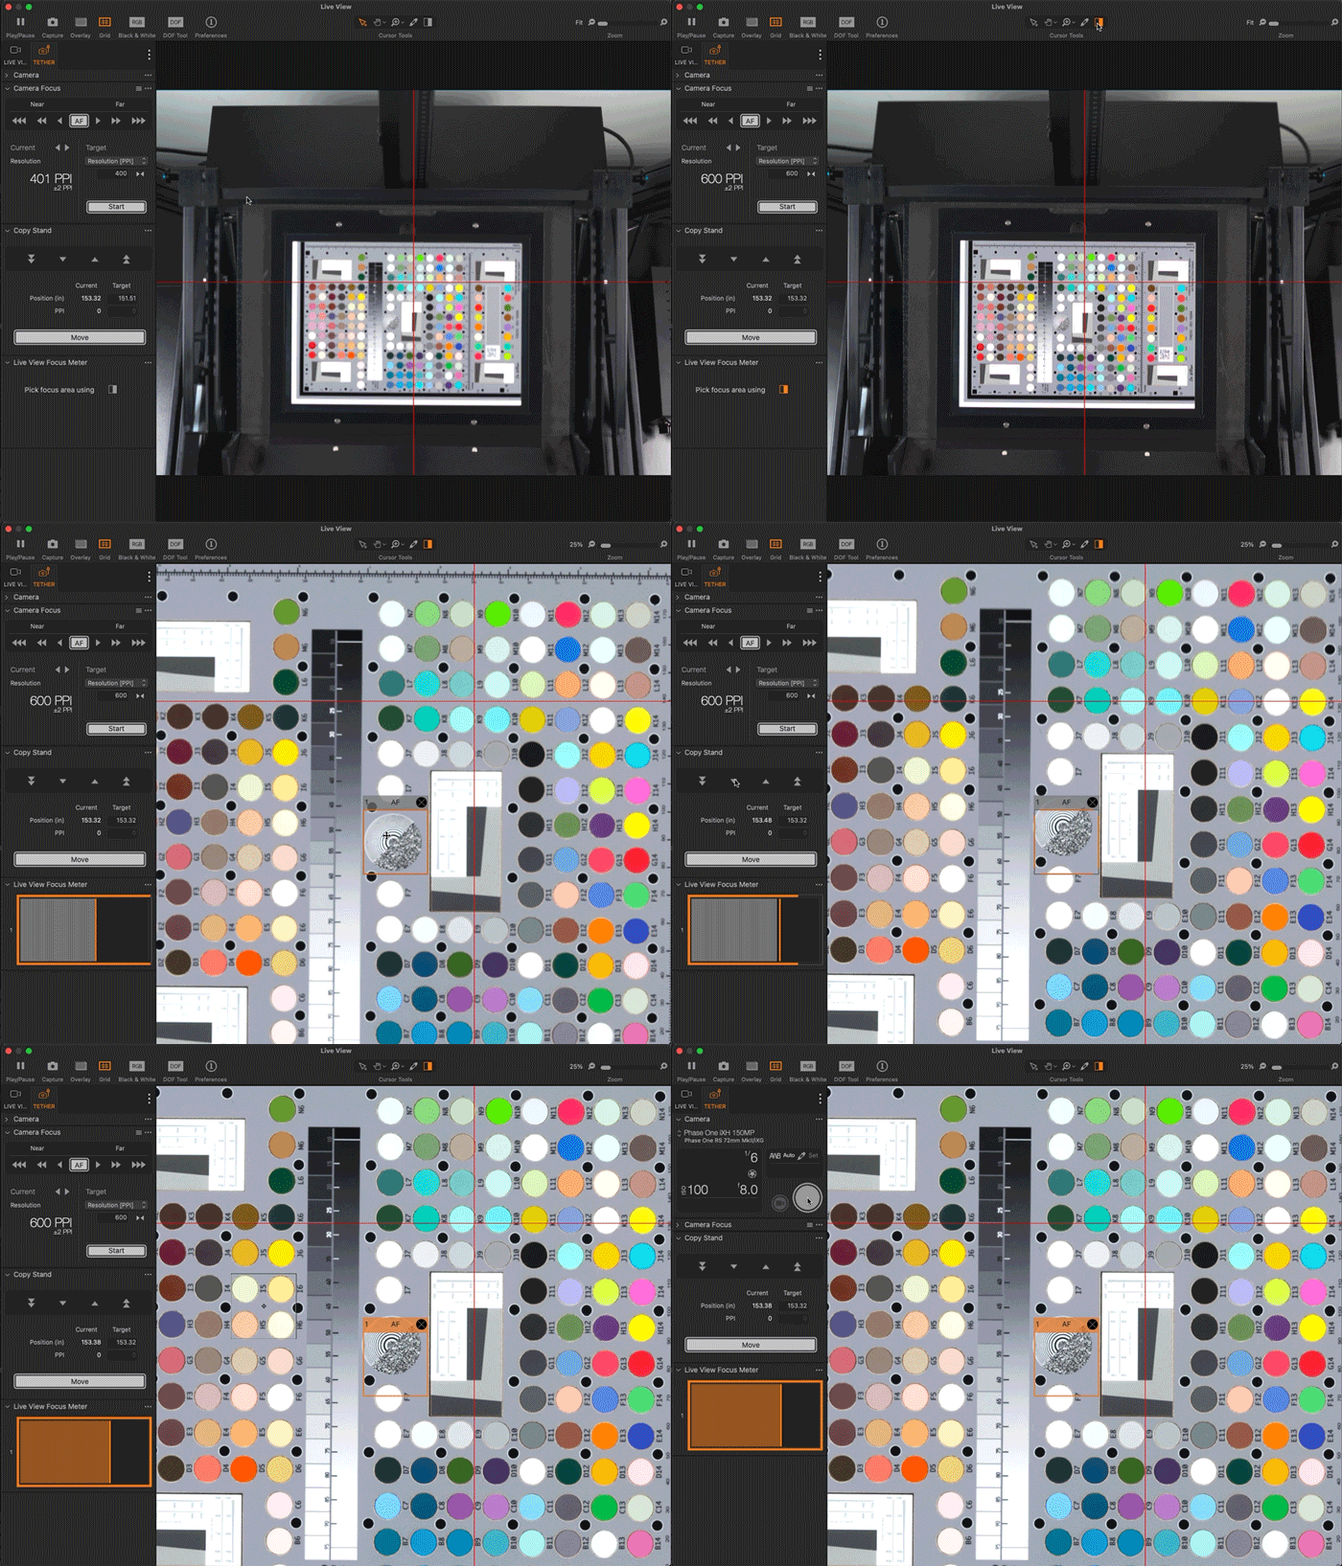
Adjusting the camera height can be done by using the Copy Stand Tool in Capture One, or by manually moving the camera using the remote for the column. Open Live View and move the camera to a location where your object and the color target are completely visible.
Type in your desired resolution into the “Target Resolution" field in the Camera Focus tool, and press “Enter” on your keyboard. Do not press “Start” as this will begin the Auto-PPI process. The camera is now focused at the desired resolution.
Place a "Live View Focus Meter" tool on the object or target. Using the copystand tool or remote, adjust the height of the camera until the Live View Focus Meter is completely orange.
Once properly focused, take a capture and zoom in to 100%, scrolling across the image to check the corners of your object and target for verification that the image is sharp.
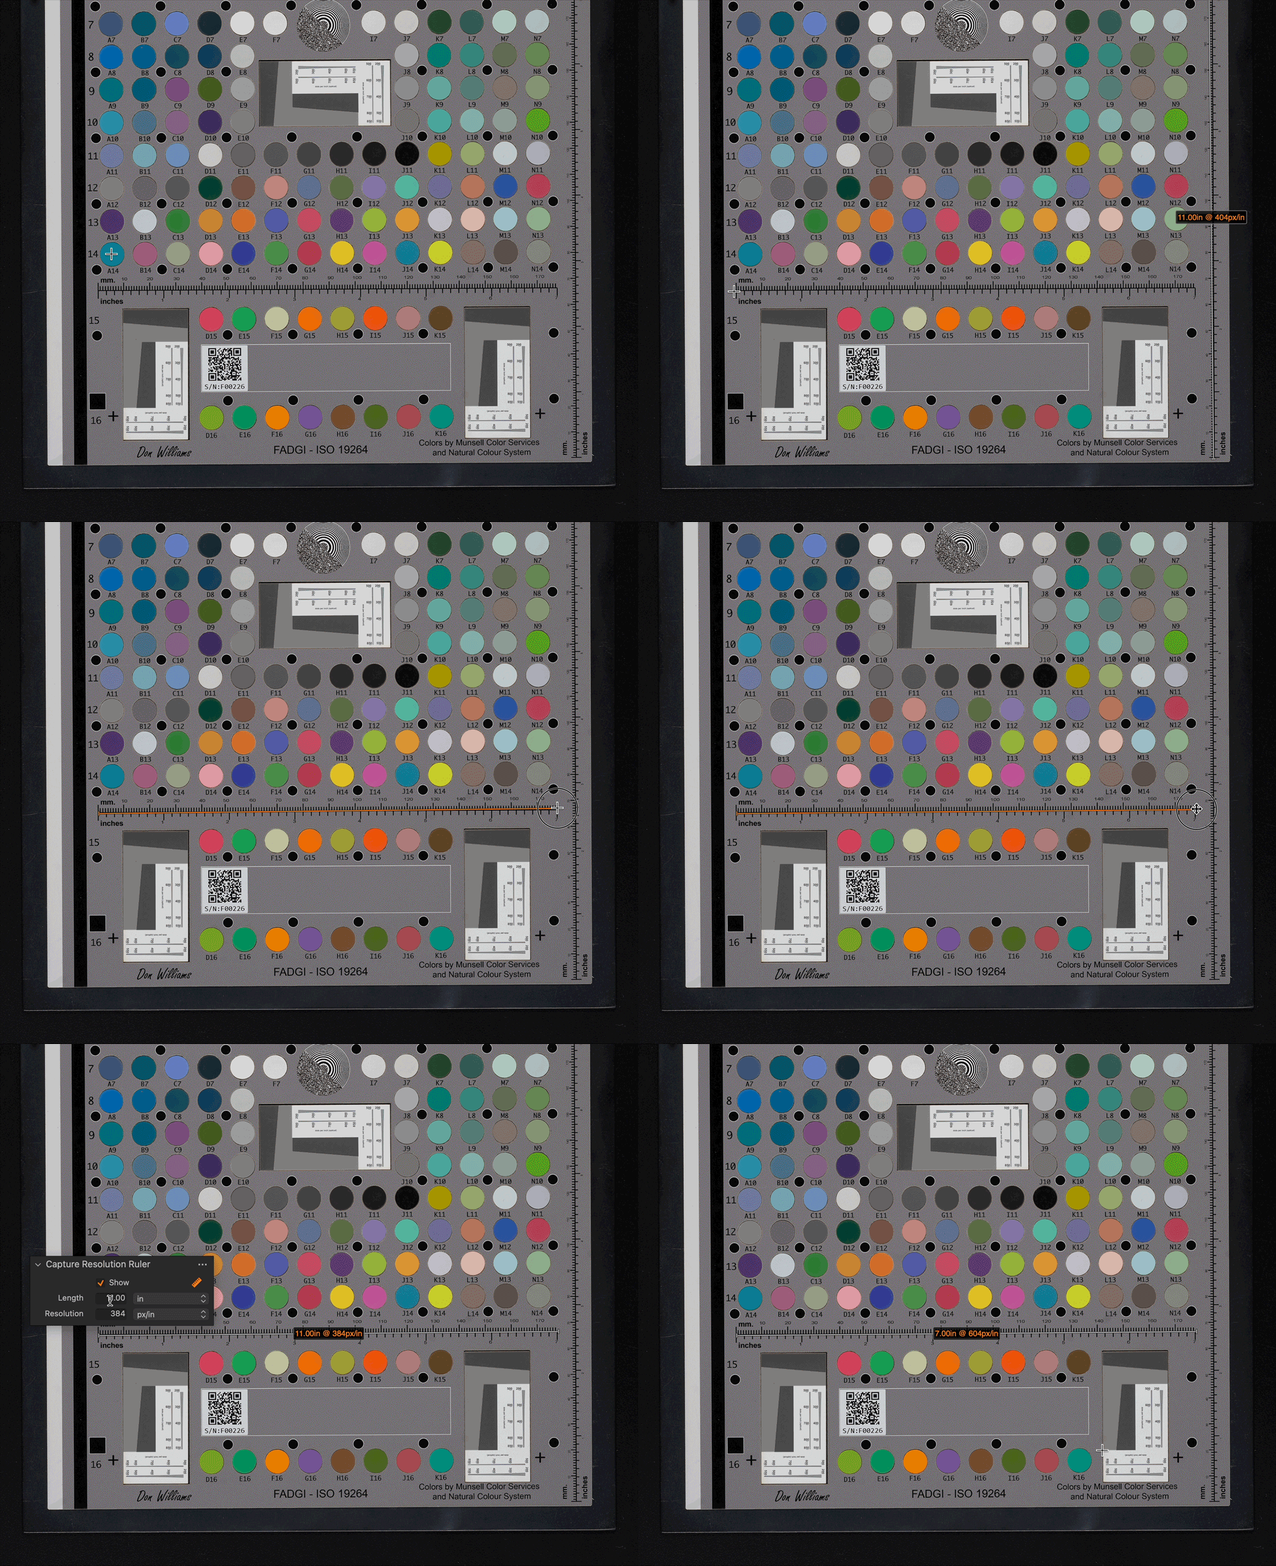
iX* cameras provide a “Current Resolution” estimate value in the Camera Focus tool. Use the Capture Resolution Ruler tool to verify the resolution of the image, and make any necessary adjustments.
Using the Resolution Ruler tool, navigate to your target and draw a line that is at least 3 inches along the ruler printed on your target. Under "Length" type in the measured distance and make sure the units of measurement are set to inches and pixels/inch. Verify that the output under “Resolution” is the desired value.
Basic Characteristics
Navigate to the Basic Characteristics tool. These settings must be set properly to reflect your equipment and material. Set each category to the settings below:
- Mode = Photography
- ICC Profile = Flat Art Reproduction - LED DT Photon
- Curve = Linear Scientific
Creating an LCC
Open live view and place a piece of white foam core/gator board into the frame, above the glass. In order to create an LCC, the entire field of view must be filled with the white board and the board should match angle of the glass.
Depending on your field of view, the LCC board on resting on the V-Cradle may not be able to fill the frame. In this case, raise the LCC board high enough to fill the frame, while staying parallel to the V-Cradle glass.
The image should appear uniformly gray, with L* values between 50 - 60L*. Adjust your shutter speed as necessary to get the correct exposure.
LAB values are the same in any output color space, and correspond to the numbers printed on Golden Thread targets. To use LAB Readouts rather than RGB, select [View > LAB Readout > GoldenThread (ICC)]
Rename the file to reflect information about the LCC that you’d like to preserve for later. It might be helpful in the future to know that the LCC was created at a specific resolution, using certain equipment, on a certain date, or for a certain project.
Press “Create LCC” in the LCC Tool Box, or by right clicking on the image thumbnail.
A dialog popup may appear here. Do not check either option, and click "Do Not Show Again". Press "Create" to finalize the LCC.
After calculating, you should see the letters LCC appear above the thumbnail image. In the LCC tool, the boxes for “Color Cast” and “Enable Uniform Light" should be checked and available. You have now created a valid LCC Profile for this capture setup.
White Balance
The white balance can be set with the White Balance Picker, located in the Cursor Tools or on the White Balance tool. Refer to the following table for ideal white balance patches.
Target Type | Patch Number |
|---|---|
ISA Object Level Target | 15 |
ISA Device Level Target | 17 |
FADGI 19264 Target | J9 |
DT NGT2 | F6 |
Click on the designated patch with the White Balance cursor active to set your overall white balance. The a* (magenta number) and b* (yellow number) values should drop to a fraction of a point.
Exposure
Click and hold on the White Balance cursor icon, select “Add Color Readout,” and add several readouts to the greyscale patches on your target.
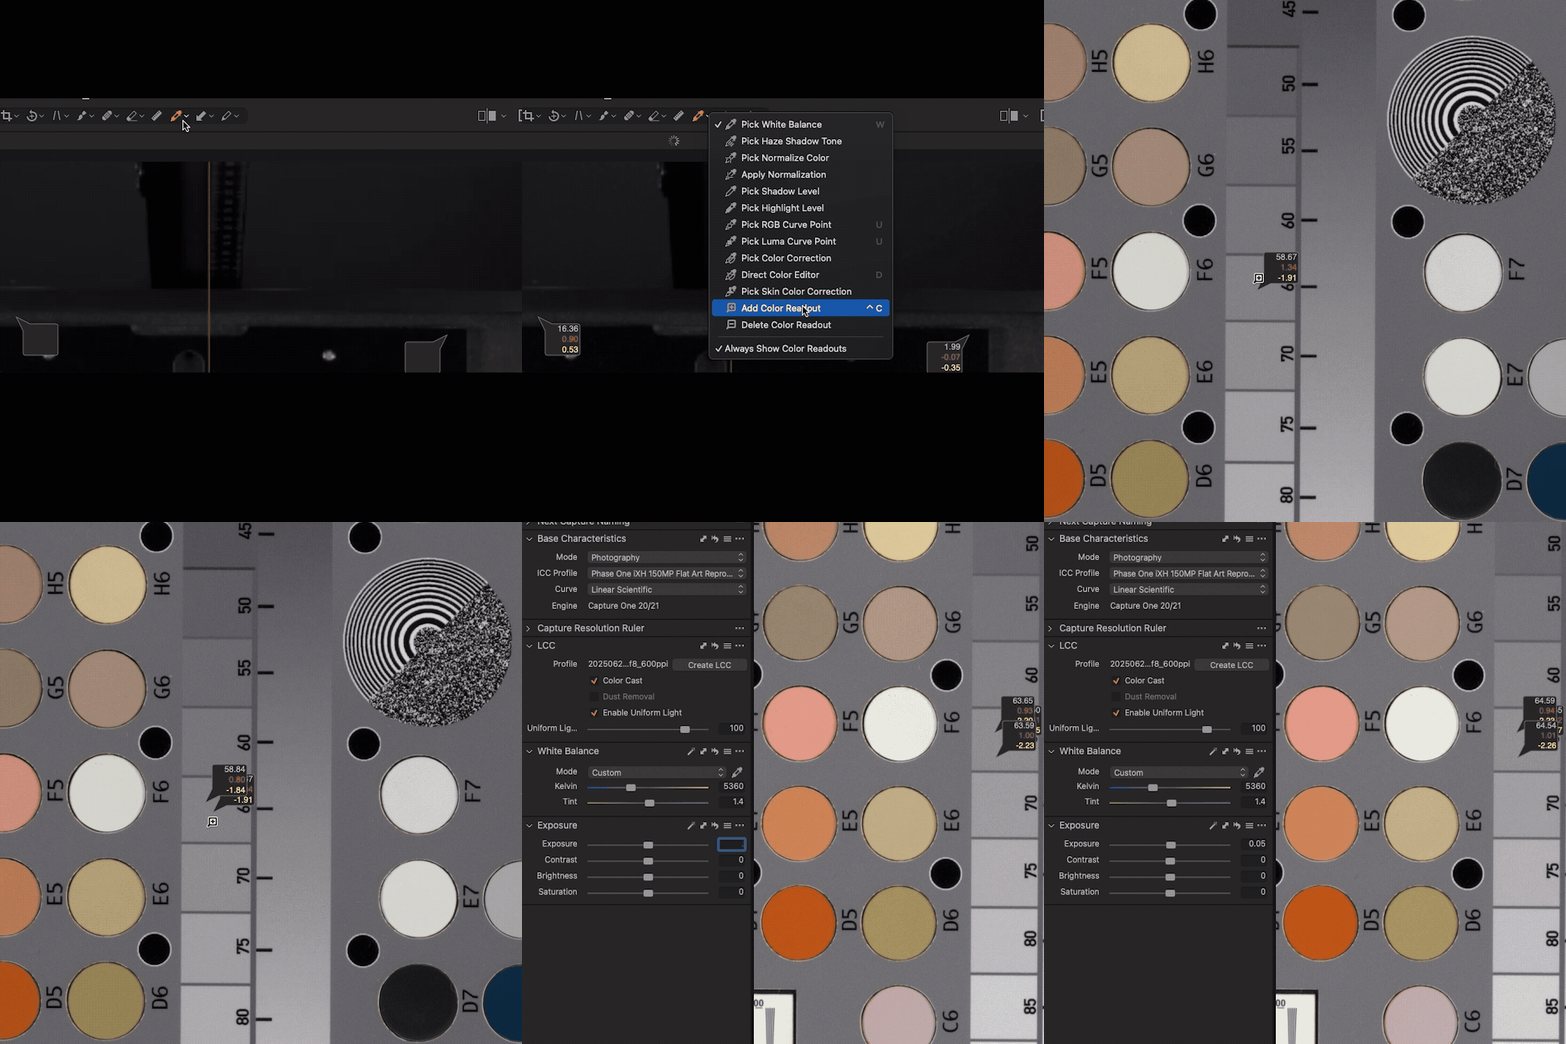
Adjust your shutter speed until the color readouts show values that are just below the values printed on your target. If necessary, small positive values (e.g. <0.3) can be used on the Exposure slider in Capture One to get closer to the target exposure values.
Never use this slider in the negative direction, as this risks incorrectly mapping clipped highlight data from a slightly overexposed image.
File Naming
It is important to establish a clear and organized file naming structure because the V-Cradle captures one page at a time, on only one side of the bound item. When working through the bound material, the pagination would be captured as page 1, page 3, page 5, etc. Due to the systematic nature of capturing every other page, it is beneficial to use the Next Capture Naming Tool, as it has many options for organizing naming conventions.
Locate the "Next Capture Naming" tool. Click on the "..." button next to “Format” to set up the ideal naming convention for your collection, ending the convention with the “Digit Counter” token.
Select the "..." in the top right corner of the tool and select “Set Capture Counter”. Type the number you’d like to assign to the next capture.
Select “Set Capture Counter Increment” and enter "2" to increase the subsequent imaging number by 2.
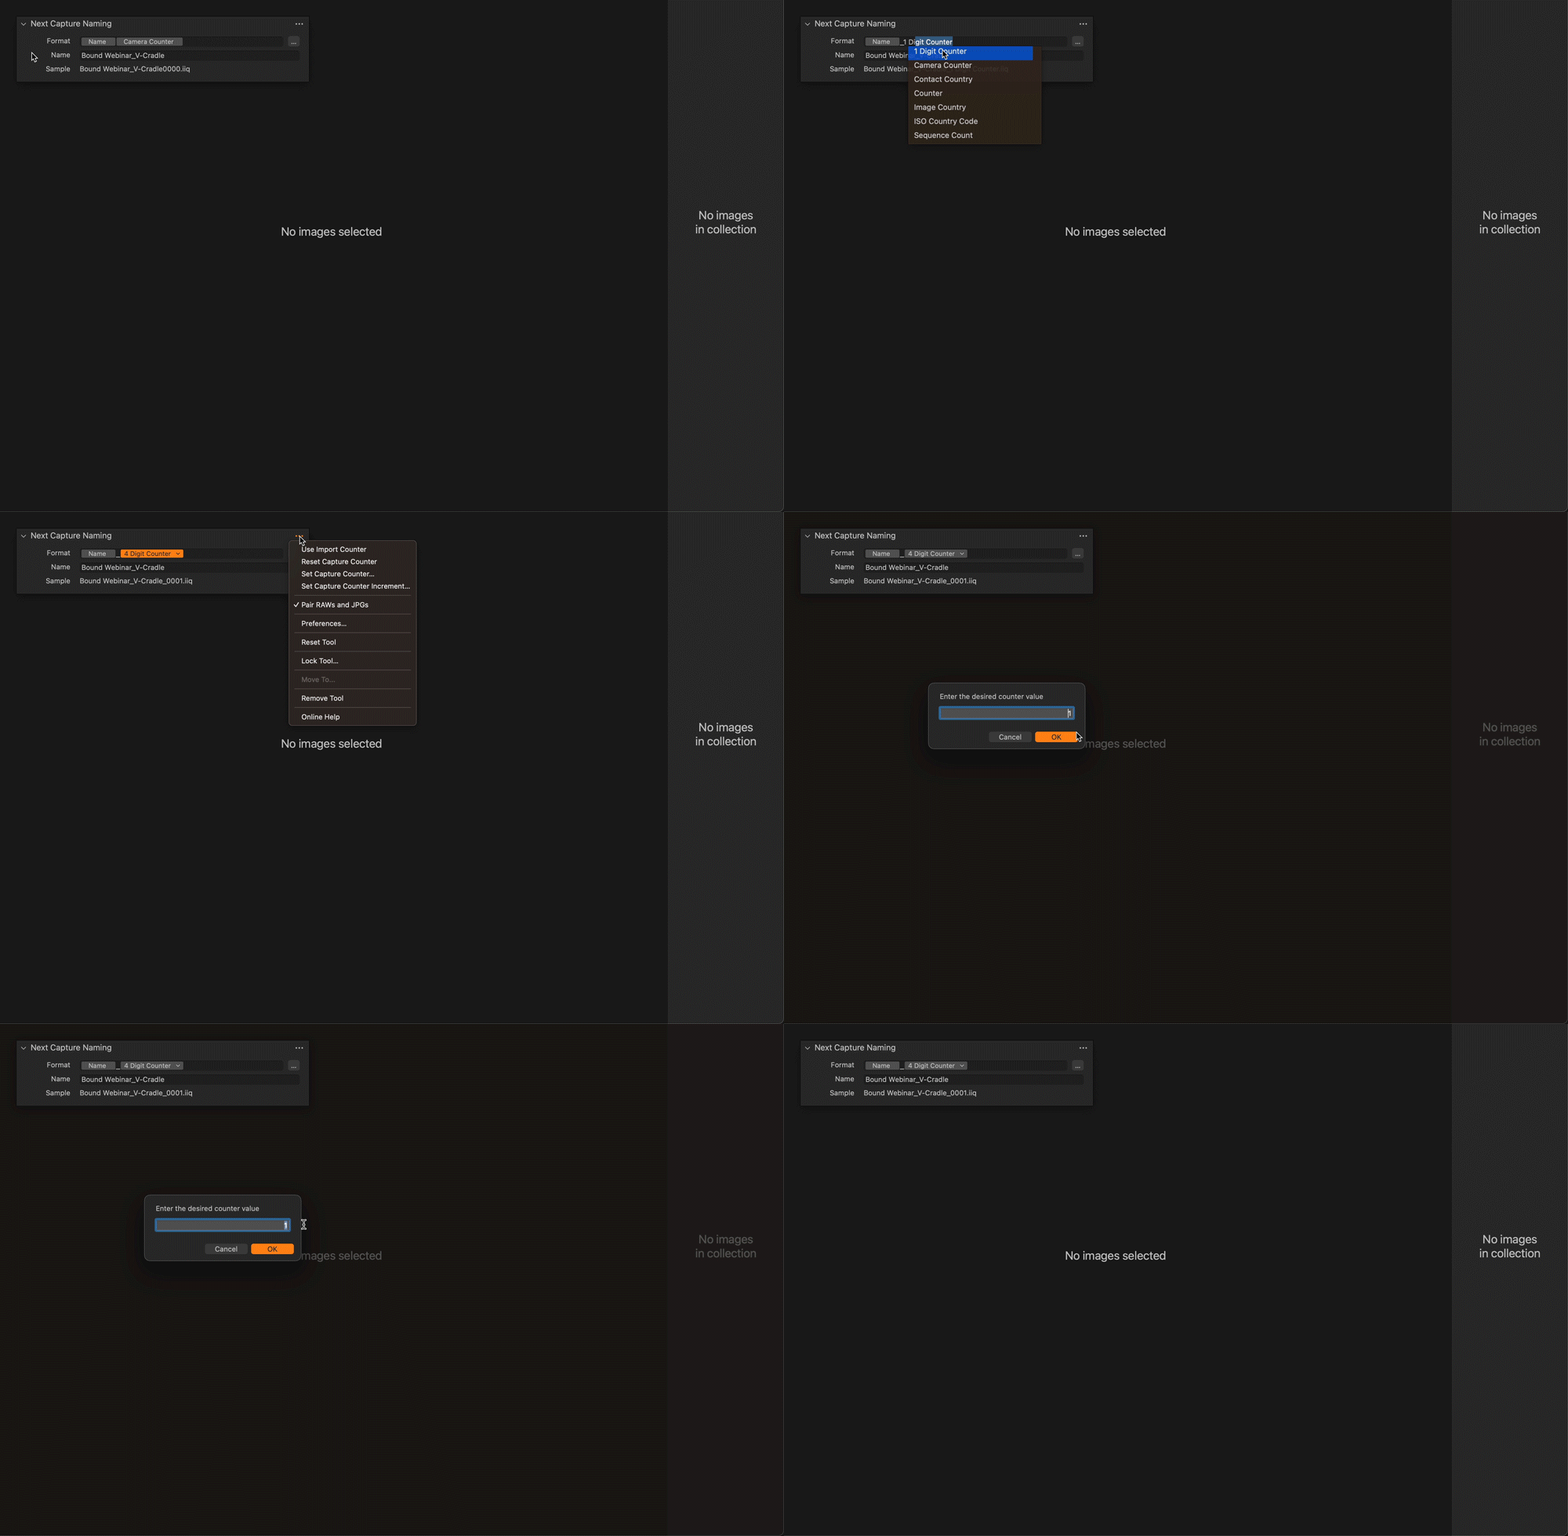
By setting the Capture Counter to “1”, and the Capture Counter Increment to “2”, we can sequentially name every other page and capture both halves of the book without needing to re-name large segments of the book.
Post Production
Once the entire bound material has been digitized, images need to be prepared for export.
Rotation & Flip
Use the Rotate and Flip tool to change the orientation of the pages, and correct any skewing. Depending on your workflow, you may choose to rotate during the Capture process.
Auto Crop
Capture One CH offers an Automatic Cropping tool, saving the operator the time and tedium of manual cropping. Auto Crop's parameters can be customized to improve performance when cropping bound materials.
- Method: controls the way the tool analyzes shapes in the image to determine the correct crop.
- Straighten: Auto Crop can automatically straighten images based on a single edge, corner, or an overall average of all four edges of an object.
- Pre-Pass: applies a contrast adjustment to increase the contrast between the subject and background without affecting the image. This aids the algorithm in detecting edges within the image.
- Optimization: Applys an Auto Levels adjustment inside the crop. This should be ignored during a bound/reflective workflow.
Once these parameters have been established and set, select all relevant frames, enter your desired padding, and click “Auto Crop”. It is strongly recommended to review each image, manually adjusting the crop where needed.